Azure Policies
Azure Policies are used to govern the resources in Azure subscription. Using RBAC, we can set restrictions to users and groups on creating and accessing resources, but RBAC alone will not help to meet certain conditions like the location, size (cost) and tag specification of the resources.
Azure policies can be assigned using the built in Azure policies or through custom policies to suit the organization’s business, financial and security requirements.
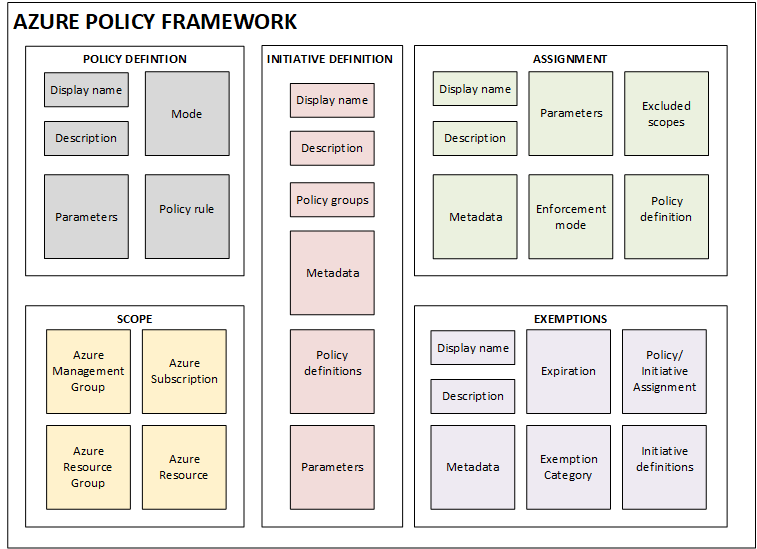
In today’s blog, we will look at the different sections involved in Azure Policy framework and how to create a sample policy in Azure.
Azure Policy Framework

To create a policy in Azure, the first step is to create a policy definition.
For the example, lets create an azure policy to
- Add a specific tag (environment) and value (development) automatically when any new resource is created in a subscription.
- For the existing resources in the subscription, the tag and value will be added by the by triggering a remediation task.
Step 1: Create a new policy definition

The full JSON for the policy rule is shown below:
{
“properties”: {
“displayName”: “Add a tag to resources for Dev environment”,
“policyType”: “Custom”,
“mode”: “Indexed”,
“description”: “Adds the specified tag and value when any resource missing this tag is created or updated. Existing resources can be remediated by triggering a remediation task. If the tag exists with a different value it will not be changed. Does not modify tags on resource groups.”,
“metadata”: {
“category”: “Tags”,
“createdBy”: “ceaaefd0-7223-410b-963a-9642e42f6e0c”,
“createdOn”: “2021-02-11T10:25:24.4992014Z”,
“updatedBy”: null,
“updatedOn”: null
},
“parameters”: {
“tagName”: {
“type”: “String”,
“metadata”: {
“displayName”: “Tag Name”,
“description”: “Name of the tag, such as ‘environment'”
}
},
“tagValue”: {
“type”: “String”,
“metadata”: {
“displayName”: “Tag Value”,
“description”: “Value of the tag, such as ‘production'”
}
}
},
“policyRule”: {
“if”: {
“field”: “[concat(‘tags[‘, parameters(‘tagName’), ‘]’)]”,
“exists”: “false”
},
“then”: {
“effect”: “modify”,
“details”: {
“roleDefinitionIds”: [
“/providers/microsoft.authorization/roleDefinitions/b24988ac-6180-42a0-ab88-20f7382dd24c”
],
“operations”: [
{
“operation”: “add”,
“field”: “[concat(‘tags[‘, parameters(‘tagName’), ‘]’)]”,
“value”: “[parameters(‘tagValue’)]”
}
]
}
}
}
},
“id”: “/subscriptions/{your subscription id}/providers/Microsoft.Authorization/policyDefinitions/c3300030-c1ea-46e3-9fee-f3d614f68894”,
“type”: “Microsoft.Authorization/policyDefinitions”,
“name”: “c3300030-c1ea-46e3-9fee-f3d614f68894”
}
Step 2: Create a new policy assignment
Once the policy definition is created, the second step is to assign the policy definition. Here we need to perform the following:
- Select the scope where the definition need to be assigned
- Select the definition
- specify the parameters which are defined in the definition: Tag Name and Tag Value
- Create a remediation task
- Create any non-compliance message


Step 3: That’s it.
With just two steps we just created a new policy definition and assigned the policy to the scope, can be a management group or subscription to create a tag and value for the resources that are newly created in that management group or subscription.
Now if you notice, any new resources created in the specific scope will have the tag and value which we defined in the policy.
Also, if you go to Remediation page, you will see that the count of existing resources that need to be remediated.

Once the resources which doesn’t have the policy applied are fully discovered, the remediation tasks will evaluate and policy definition will be applied.


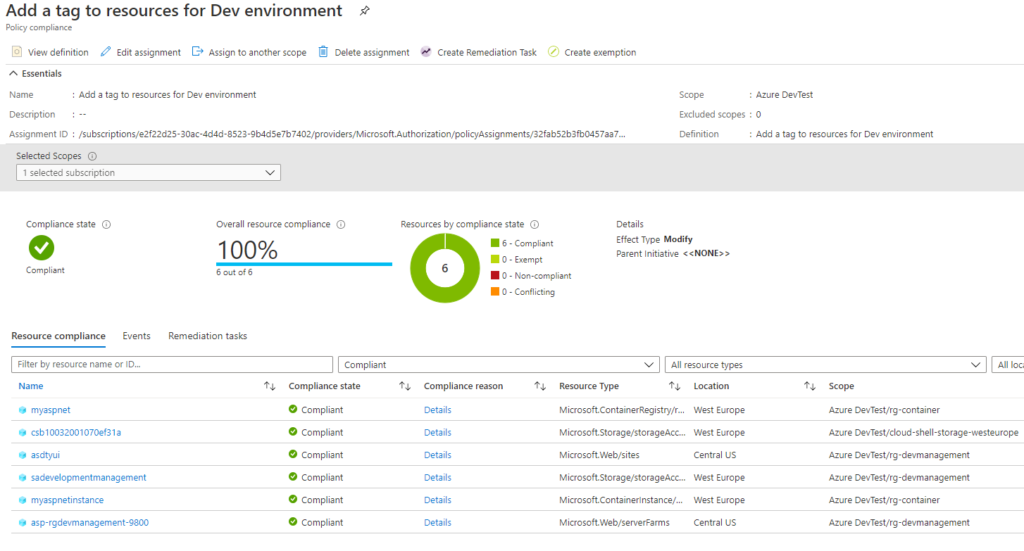
By going to policy compliance, you can see the resources by policy compliance status
