
Azure App Service (ASP.NET Core) using DevOps CI (Build) and CD (Release) Pipelines.
December 12, 2020
There are multiple ways to provision Azure App Service (website) and App Service Plan in Azure. In this blog we are going to see the use of DevOps Starter for creating App Service, App Service Plan and Application Insights along with the DevOps CI/CD pipelines.
DevOps Starter
DevOps Starter is available from the Azure portal. We create a DevOps Starter resource just like the way we create any other Azure resource from the portal. DevOps Projects provides a step-by-step wizard-like experience for the various configuration options.
- Go to your Azure Portal and Add a DevOps Starter resource
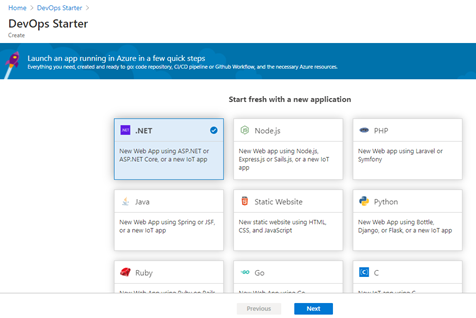
- Select .NET as we are planning to create an ASP.NET Core App Service and click Next
- Select ASP.NET Core and click Next

- Select Windows Web App and click Next

- Fill in the values for the Web App (App Service), DevOps Project, App Service Plan, Location etc. as shown below and click Done.

- Wait for few minutes and the below components will be created in your DevOps organization:
- Code and ARM template for the App Service will be created in Azure Repos
- Code and ARM template for the App Service will be created in Azure Repos

- Build Pipeline (CI) will be created in Azure Pipelines (Build Pipelines are mentioned as just Pipelines)

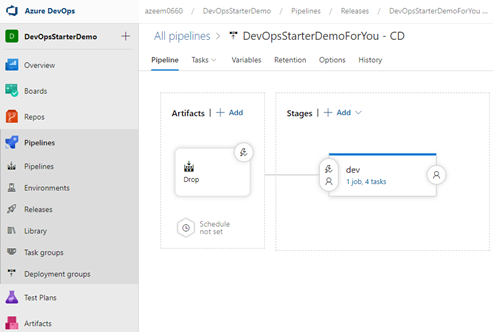
- Release Pipeline (CD) will be created in Releases (Under Pipelines)
- You can also track the progress of the CI/CD pipeline activities using the DevOps Starter Dashboard

- Once the DevOps CI/CD pipeline are executed, the below Azure resources will be provisioned
- App Service Plan
- App Service (Web App)
- Application Insights

- If you want to open the source code of this project in your local Visual Studio, just clone the project in Visual Studio from Azure Repos Files


- Once the cloning is complete, you can see the projects are available in the Solution Explorer of your Visual Studio
